Thursday, 30 December 2010

Slide Mailer Christmas Gift


I made this slide mailer as part of Lynne's Christmas gifts. I painted it Bronze and then added some Angelina fibres and some accent beads. I made two large Fragments with Crafty Individuals stamped images, added some German Scrap wings, and two Cherubs made from a Krafty Lady art mould from the Stamp Bug.


Inside I added an image from an ATC Collection Pack, and then the two images behind the microscope slides which are from Crafty Individuals. I then filled in the little gaps top and bottom with Glossy Accents and Accent Beads. And Yes, the pink notebook was for Lynne - who else?!

I gave the advent calendar to my sister in law as she has three children so I thought she would appreciate it as they still have a tree and other decorations. She cooked us an amazing Christmas dinner which must have taken as look to prepare as my advent house did to make!


Friday, 24 December 2010

Happy Christmas

Happy Christmas to all of you! Thank you so much for your support and encouraging words over the last year, and for the wonderful artwork that has inspired me so much on your own blogs.

As well as wishing you a wonderful day tomorrow, I also wanted to say that I very much understand that sometimes it can be a difficult time of year. I send my love and thoughts to those of you who have lost a dear one this past year, or for whom it is a difficult anniversary. I hope everyone is with those who love them over the next few days, that you are happy and safe, and in the warm.

Sending you peace and good wishes!

Sunday, 12 December 2010

Caught in Crystal Tutorial

I have a tutorial on Gingersnap Creations Blogspot today, using Tim Holtz Fragments with the Caught in Crystal technique. Here is a sneak peek of the project I then used it to create:-

I love little trays like this that you can do collages in, and this one was from Elaine at the Quixotic Paperie, who do lots of lovely bits and pieces!

Thursday, 9 December 2010

Jewellery Box with Fragments

I made this jewellery box for my dear friend, Pauline, for Christmas (I don't think she will look on here). The little papier mache lidded jewellery box by Efco has two drawers and a mirror under the lid. I got it from the Altered Element and it was going to be one of my projects for my November guest spot, before they announced their closure.

I hadn't intended on this type of design. I was going to cover it all over with decorative papers and stamping but once I had painted it with the pink Precious Metal Colour paint I didn't want to cover it up too much as it has a lovely shimmer. I was working on another project using fragments (For Gingersnaps on Sunday) and thought they would work well on the lid.

View of the Top of the Lid
 I used Crafty Individuals spring papers to stamp on, with their Queen of Hearts and Scroll stamps, which are two of my favourite sets.
There are two little drawers

There is a mirror under the lid

Sunday, 5 December 2010

Pink Notebook Gift

I decided I would make a pink notebook as well, and this is the same process as the other day but with pink fusible fibres, which they call Red. I also used some crackle paste, some pink Shimmerz paint and some Silkies, along with the gold leaf and the beads.


For the centre, I used a piece of Crafty Individuals Spring backing paper, and made a one inch Stampbord tile using a CI stamp, then glazed it with Glossy Accents. I hope my friend will like it.

Thursday, 2 December 2010

Notebook Christmas Gifts

I got bored of making Christmas cards! Felt like being a bit more messy! I like to make presents for my crafty friends at this time of year, as they know I can't afford expensive presents, and I think they know I will put a lot of love into what I make for them. I hope so.

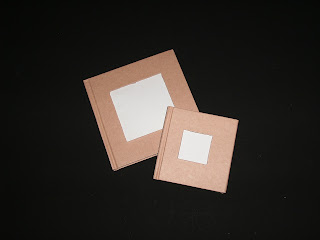
You can get these irresistibly plain and good value notebooks from the Artistic Stamper, which are crying out to be decorated:-


 I love the fact that you can get the ones with the photo bit in the middle, and there are two sizes as you can see. First of all I decorated the 'frames' of both of them:-


This is a close up of the Angelina Fibres, melded to the frame with the heat gun. It's a new colour for me, I thought it would be gold but it is sort of straw coloured with a little gold running through. Unfortunately it looked disgusting at first, like the contents of my hair-brush! So I dabbed on some of the blue pearl paint I was using and I preferred this:-


This is the only one I have finished so far.This one has lots of gold leaf and I left the 'straw' as it was. I popped a little Crafty Individuals romantic 1920s Paris image into the frame. I have a particular friend in mind for the style of this one, although she might like the pink one I am currently working on .........!

Sunday, 28 November 2010

More Christmas Cards

 Thought you might like to see a few more of the Christmas cards I have been making.


For the little angel from Crafty Individuals, top left, I coloured her with Pro Markers and used a fine glitter on her wings, then made some faux metal and put it through an embossing folder and then the Alterations Baroque die. The Three Kings by Elusive Images, kindly lent to me by Alison, were also coloured with Pro Markers. For the little angel bottom left I alcohol-inked some card stock and cut the border strip with a Cuttlebug die.

I made the Easel card using a wooden reindeer from the Altered Element and Nestie and Alterations dies. For the Elusive Images scene, kindly lent to me by Alison again, I used Pro Markers and cut off the greeting from the bottom, and used the Following Yonder Star from the Three Kings set, on an Alterations die. The edging on the left was again the Cuttlebug die.The card bottom left was made with the Crafty Individuals Partridge in a Pear Tree, coloured with Pro Markers and the edges corner-rounded and inked. The partridge bottom right of the card is from the Creative Expressions set. The card bottom right uses the same stamp sets but on shrink plastic, but I have used the remains of the paper cut from the edges of the bracket shaped card to make a pretty shape across the middle of the card.


The top two cards are again the Pear Tree sets on shrink, and the one on the right has a border strip across the middle which was part of the lower piece of card used to cover the bracket shaped card, with another, co-ordinating, piece for the top half. For the card bottom left I used the waste card from cutting out some reindeer, i.e. the negative, and bottom right I have used the Three Kings, this time on shrink plastic.