Have you been enjoying the new Unruly Paper Arts Blogozine? The first issue focused on inky techniques and I was sad I had too much going on to participate in it from day 1. Issue number 2 launched yesterday, and the theme is Wedding Wonders. I have my first column up later on this month - something to wear at a wedding! My column will be concentrating on altered art, particularly economizing and upcyling, as that's me!
For yesterday's Reader Art Quest, where we are looking to you to make something with a wedding theme that is anything you like except a card, I have made a heart shaped tin into a wedding themed memento box. This came about as we have been trawling through our flooded loft to see what can be salvaged and came across some chocolate boxes dating back to our marriage in 1984, containing the cards and gift tags we received, together with other memorabilia of the day. There was a smaller box containing the sugarcraft floral spray from the top of our wedding cake which sadly was very soggy. So I thought this tin, with its aperture lid, would be perfect for a preserved wedding bouquet, or perhaps the bride and groom figures from the cake, or a 'something blue' garter. I'm pleased to say the marriage has survived our recent disasters, if not the memorabilia!
For the inside of the tin I drew around the heart shape onto card and inked it up with wrinkle free distress and then added a collage of Crafty Individuals' stamps. I used lace, and pearl trim around the inside edge.
I gessoed the tin then painted it with Fresco Finish paint and stamped with various text stamps from Crafty Individuals, and added pearl trim around the inside edge of the aperture. The large flowers are made from Crafty Individuals' spring background paper, using my clear packaging material technique to give a little dimension, and the leaves are cut from a piece of lace.
As you can see here, I used the brand new butterflies stamp from Crafty Individuals which I love! I also used an old stamp of theirs, the lady with the butterfly covering her bottom, which says Forever in my Heart, just for a touch of wedding romance.
Showing posts with label Crafty Individuals. Show all posts
Wednesday, 2 May 2012
Friday, 20 April 2012
Another Crafty Individuals' Collaged Bag!
I'm still sticking with what I know, and not pushing myself to try anything new as I still don't have my confidence back after the recent upheaval to my life. I enjoyed making this bag though. The Crafty Individuals' stamps I have used are too numerous to mention but the good thing is, any of their stamps work well for this style. This time I didn't add lots of colour and I feel I might actually use this bag on a night out - if I ever go anywhere!
I am entering this for the Stamp Man challenge, which is shabby chic, my first challenge in quite a while!
Labels:
Crafty Individuals,
The Stamp Man,
Vintage Bag
Friday, 6 April 2012
Another Bag - with a Crafty Individuals' Collage
I'm being a bit feast or famine with my blog postings and maybe should have held this one back but I finished it at midnight last night and was much happier with it than the previous one, so I wanted to blog it straight away. Although I adore the Sheherazade stamps, there were so many flaws of my making in the bag so I wasn't really happy with it, and I am still trying to get myself organized enough to be able to craft - you know how it is, if something isn't working out normally you have a product or a tool to hand to remedy it but I still can't find anything! Also my patience and concentration are not very good so I give up at the first hurdle!
As I have mentioned before, I have been totally inspired by Paula of Ephemera's Attic's beautiful work in making these bags. She has such a wonderful sense of colour and design.
This bag has two sides to it and I collaged together a selection of stamps and parts of stamps from Crafty Individuals. As it was then quite 'busy', I kept the trim fairly simple. The thing I am pleased with is I love a bargain and I got the base bag from the 99p shop (am I going back there? you bet I am!). They are nothing like as easy to work with as the lovely ones I normally get from Happy Daze as they are black and kind of snakeskin so you have to cover up the colour and the texture before you can do anything else, and they are less elegant as they don't have the chain handle. But for me at the moment having a cheap base item I can mess up if needbe gives me more confidence. And I found it satisfying as I was with my friend, Elaine, when I bought it and she thought it was hideous and wondered 'where is she going with this?', so it was rewarding to turn it into something pretty.
I started to feel a bit more like my old self as I crafted at midnight last night. People often talk about losing their Mojo and to be honest that hadn't happened to me before. That is not to say that I make good stuff or have good ideas all the time - far from it - but I had always felt I was in the mood to craft and I never felt I was sat in the craft room staring at a blank desk for long, I just get stuck in and make something even if it is rubbish. But these past few weeks I have had no desire to craft and not a single idea in my head, and I wondered if I would ever feel creative again. When I gave up my job a few years ago I wondered why I had never wanted to craft before and now I realize that the stress I was under at work didn't leave any space in my head. And that is what has happened again since our disaster - the stress has been so enormous I haven't been able to think about or concentrate on anything except house stuff and worry. So I'm hoping the worst is over now ......
On that note, I am hoping to soon be able to get stuck into writing a column for the new Blogozine, Unruly Paper Arts as I had to put my involvement on hold. Have you seen it yet? It is looking great! My contribution, I hope, is going to be a column on altered art with the emphasis on using things that are inexpensive either as a substrate or as a product, as that is what I find the most rewarding. Hope you will drop by and see what everyone is up to so far!
One final thing (crikey, I am going on a bit today, I told you it was feast or famine with me!) you may remember a while ago I ran an on-line course on making your own moulds which went really well. This perfume bottle was one of the items I showed you how to make:-
If you would like to take this class and didn't have the chance before, I am running it again before I start on a new one. The cost is £7.50, $12 US dollars. Please drop me an e mail at lucy@cedmondson.net if you would be interested.
Sunday, 1 April 2012
Crafty Individuals' April Challenge - Time for Summer
This is my first bit of crafting since our disaster, but my goal has been to be in a position to make something for Crafty Individuals for their April challenge. I really struggled with it as I couldn't find any of my supplies, everything having been either trashed, or thrown into packing crates. Once I had got what I needed around me though, I really got into the zone and it was a lovely feeling of normality. We are still spending all of our time sorting out problems with the house and dealing with the insurance company, and have had problems with the plumbing in our rental accommodation which has caused additional anxiety.
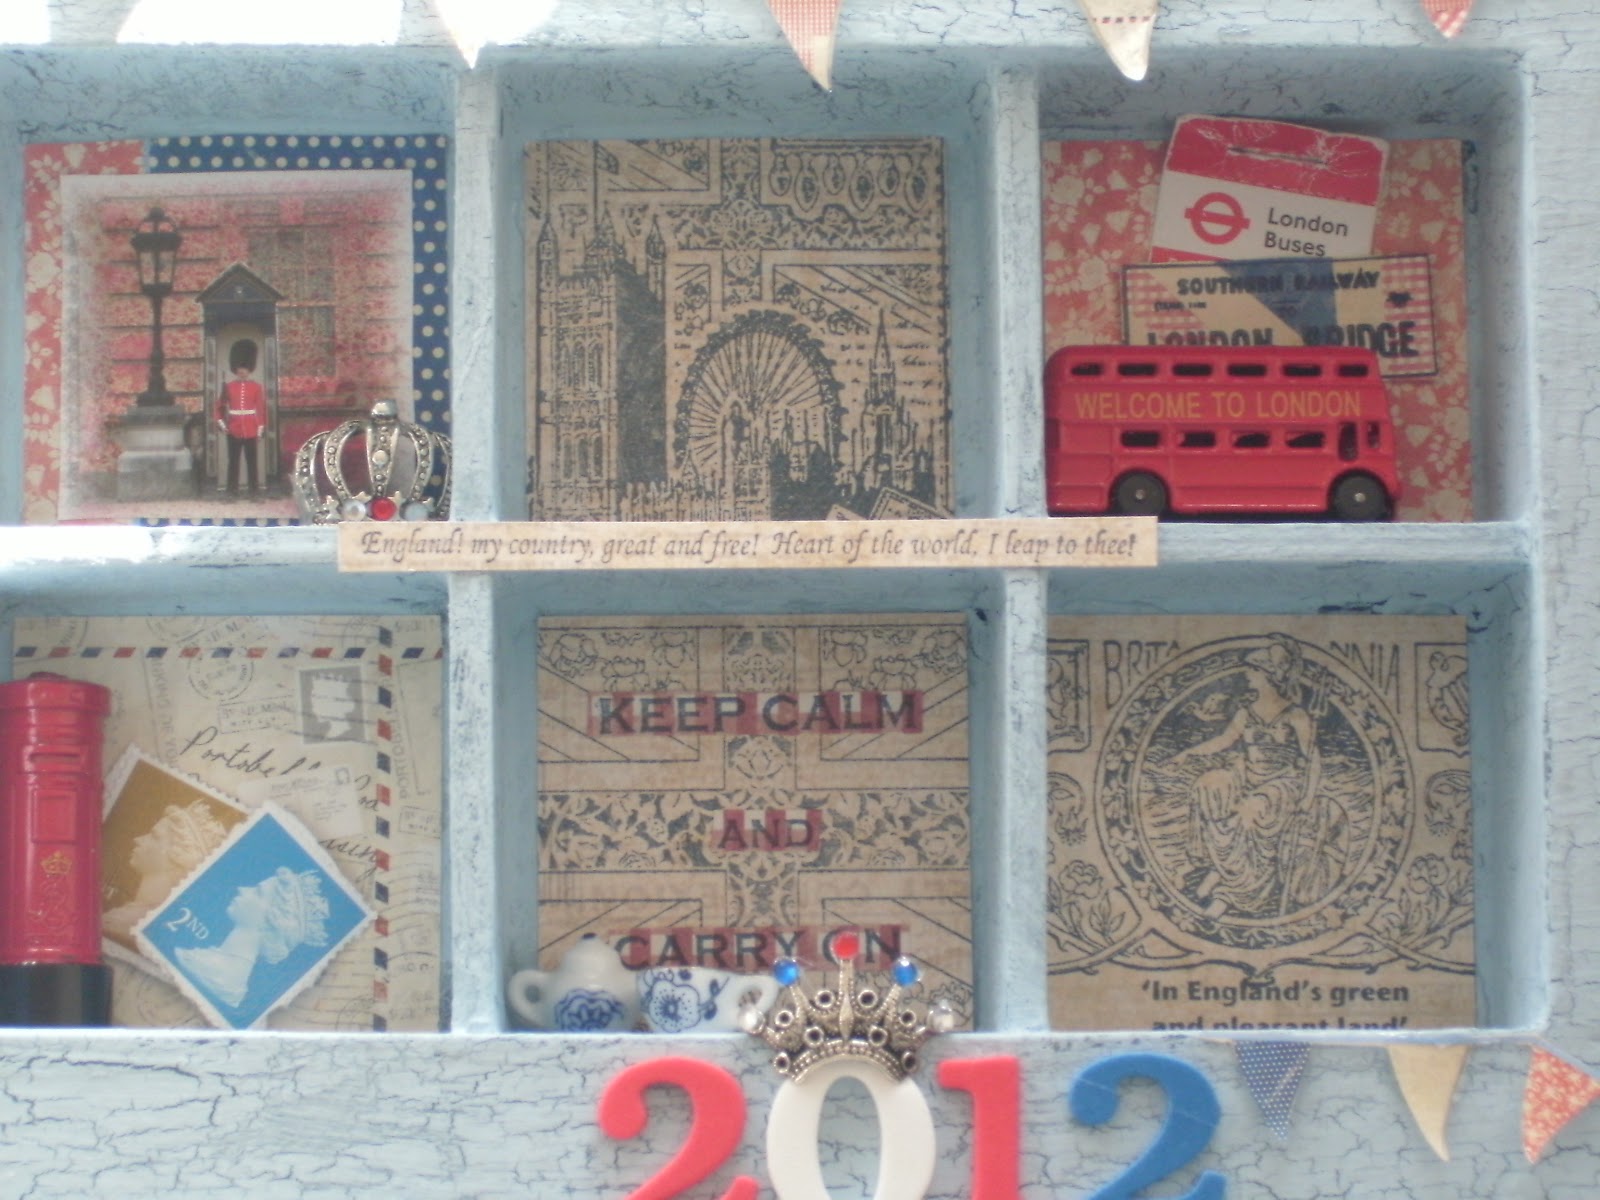
Anyway, enough of that! The Crafty Individuals' challenge for April is 'Time for Summer'. I thought it would be fun to interpret it as Summer 2012 with a Great Britain theme, as I wanted to use the two new sets of GB stamps from Crafty Individuals, the collage one, CI 343 and the one with the individual images and the flag, CI 334. I wanted it to have a flavour of the Olympics and the Queen's Diamond Jubilee, and a feel of lots of tourists visiting London this summer.
I painted the divided tray with Fresco Finish in Baltic Blue, then their crackle, then a layer of Sky Blue. I painted the grunge letters to spell out Summer using a mixture of the two, and 2012 using foam letters. I used Papermania Portobello Road papers for the backgrounds, and also cut the bunting out of the cover sheet and adhered it with dimensional Pinflair glue. I added a crown charm with some adhesive gems on it to the 0 of 2012.
Here's a closer view. For the first section, top left, I used the Beefeater image from People and Places Book 2 from Crafty Individuals, and added another crown charm again with adhesive gems. To the right of this is a section with the collage stamp of the Houses of Parliament and Big Ben and the London Eye stamped in Cobalt Blue archival ink. Far right is the London Bridge ticket stamp and a London Bus charm, with a bus ticket I found in a coat pocket the other day after I had washed it!
Across the centre I have stamped the quote stamp. Bottom left is a piece of the Portobello paper depicting a post card so I have added some used stamps and a post box charm. The charms were on key rings and when I removed the shanks a little bit of the enamel came away, so I topped it up with red nail polish! To the right of this is the flag stamp and the Keep Calm and Carry On wording. You can just about see a tiny porcelain tea pot and tea cup as my idea of keeping calm is to make tea - very British! Finally to the right of this is the medallion part of the individual stamp set, with the 'In England's Green and Pleasant Land' quote.
It is my birthday today as I am writing this so we are trying to have a day off 'house stuff' although we hadn't had any water here for 24 hours but fortunately that is sorted out now. Yesterday we went out for an amazing Thai buffet and then my best friend took me for a facial. We are going to do a BBQ later although it is a little cooler than it has been, and I am off in a mo for a browse around Hobbycraft. So nice to do normal things! Thank you so much to everyone who has kept in touch; it means so much. I will try to blog now and again but am still a bit bogged down and don't have very much time.
Anyway, enough of that! The Crafty Individuals' challenge for April is 'Time for Summer'. I thought it would be fun to interpret it as Summer 2012 with a Great Britain theme, as I wanted to use the two new sets of GB stamps from Crafty Individuals, the collage one, CI 343 and the one with the individual images and the flag, CI 334. I wanted it to have a flavour of the Olympics and the Queen's Diamond Jubilee, and a feel of lots of tourists visiting London this summer.
I painted the divided tray with Fresco Finish in Baltic Blue, then their crackle, then a layer of Sky Blue. I painted the grunge letters to spell out Summer using a mixture of the two, and 2012 using foam letters. I used Papermania Portobello Road papers for the backgrounds, and also cut the bunting out of the cover sheet and adhered it with dimensional Pinflair glue. I added a crown charm with some adhesive gems on it to the 0 of 2012.
Here's a closer view. For the first section, top left, I used the Beefeater image from People and Places Book 2 from Crafty Individuals, and added another crown charm again with adhesive gems. To the right of this is a section with the collage stamp of the Houses of Parliament and Big Ben and the London Eye stamped in Cobalt Blue archival ink. Far right is the London Bridge ticket stamp and a London Bus charm, with a bus ticket I found in a coat pocket the other day after I had washed it!
Across the centre I have stamped the quote stamp. Bottom left is a piece of the Portobello paper depicting a post card so I have added some used stamps and a post box charm. The charms were on key rings and when I removed the shanks a little bit of the enamel came away, so I topped it up with red nail polish! To the right of this is the flag stamp and the Keep Calm and Carry On wording. You can just about see a tiny porcelain tea pot and tea cup as my idea of keeping calm is to make tea - very British! Finally to the right of this is the medallion part of the individual stamp set, with the 'In England's Green and Pleasant Land' quote.
It is my birthday today as I am writing this so we are trying to have a day off 'house stuff' although we hadn't had any water here for 24 hours but fortunately that is sorted out now. Yesterday we went out for an amazing Thai buffet and then my best friend took me for a facial. We are going to do a BBQ later although it is a little cooler than it has been, and I am off in a mo for a browse around Hobbycraft. So nice to do normal things! Thank you so much to everyone who has kept in touch; it means so much. I will try to blog now and again but am still a bit bogged down and don't have very much time.
Tuesday, 14 February 2012
Valentine's Day Card
Happy Valentine's Day! This is the card I made for Col, which I took to France to give to him on the day, but it has ended up being carried back with me. It is a very, very simple card, which is what he likes. I covered the 6 x 6 card blank with Crafty Individuals' background paper and put the edge of the card through the Tim Holtz On the Edge die, and inked the edges. I stamped the Crafty Individuals' stamp in Black, and made the flowers with the Tattered Florals Die out of satin fabric, and singed the edges.
It will probably be a funny old Valentine's Day tomorrow, in our strange circumstances, but at least I will be with my loved one.
Tomorrow's blogpost will be the last of the things I had already scheduled. I made a number of things before I went away but they are floating in water now.
Wednesday, 1 February 2012
Crafty Individuals' Challenge - Spring
Crafty Individuals have now blogged their new challenge which is Spring! Bring it on! You now have two months rather than one month to enter their challenges and I have just seen what my DT colleagues have made - Wow! So do go and take a look.
This is my offering. I painted the frame first then covered it with Spring background papers which I have always loved (although check out the Summer ones!). I did some background stamping with CI 258 (Words), CI 171 (Harlequin), and CI 194 Music Script. I then stamped the Swirls (CI 235) in a stronger colour, Sepia. I stamped the Butterfly Girl but cut away her butterfly wings (that was fiddly!) so I could add some corrugated metal wings I got for Christmas. I painted her dress with some watered down pink paint I had left on my craft sheet from painting the frame (as you do!). I added a crown to her head athough it does look a bit like it is floating, maybe a halo?! I sponged all the edges with Sepia ink and added a bit of faux German Scrap below the roof (Tim's tip of using his Vintage Lace die, I think I will be doing this a lot). Normally when I make these frames I can't resist a clock at the top, so I tried to be different and used a smiling sun mould in clay - because we will have a very sunny Spring!
Saturday, 10 December 2011
Crafty Individuals' December Challenge - All Wrapped Up
I made some little Christmas gift bags using Crafty Individuals' Christmas backing papers and stamps, for their December Challenge, which is All Wrapped Up. I hope you will join in.
Wednesday, 7 December 2011
Starry Nights on Gingersnaps
I thought I was going to miss the deadline for this dt piece for the first time ever! I still have this horrible throat bug and conjuntivitis and have nearly lost my voice. The surgery are sending a prescription to my local chemist for my kind friend to pick up, but I am not holding out much hope of getting better quickly.
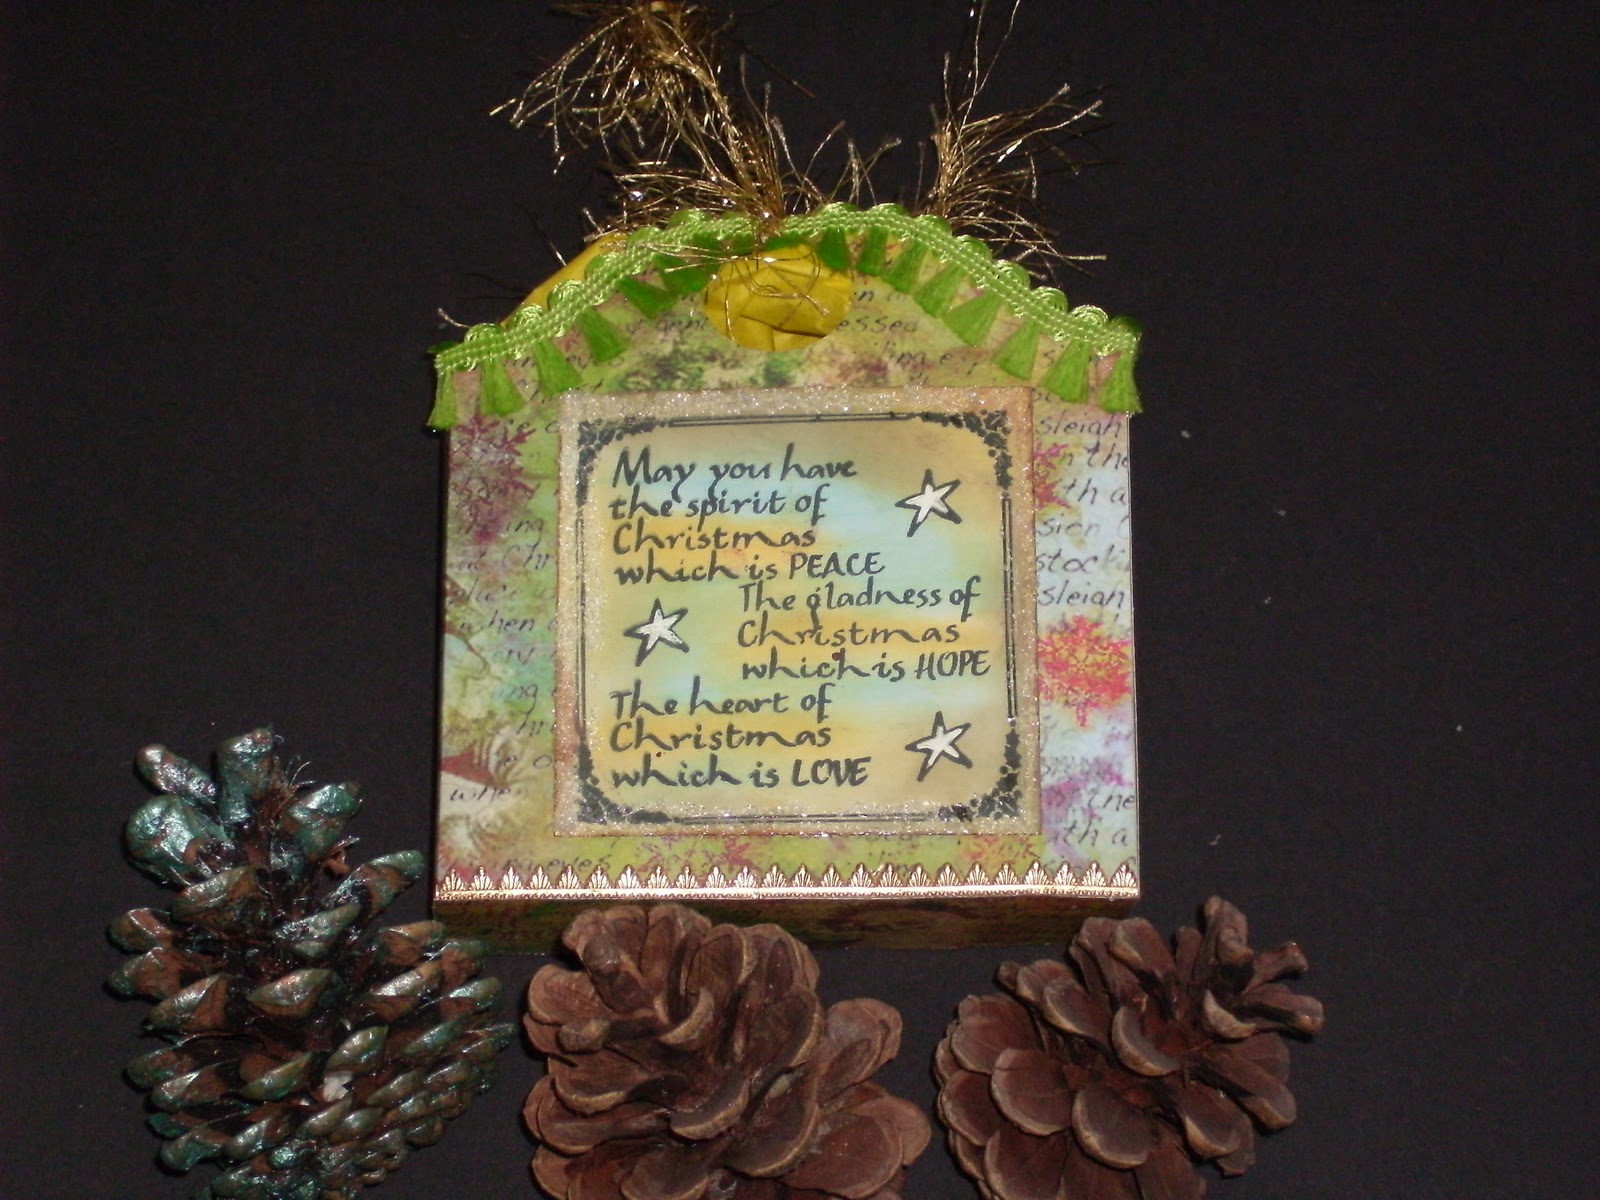
The Gingersnap theme launching today is Starry Nights, and I wanted to create a Christmas snowy and starry scene inside a bubble box. I used Crafty Individuals' Christmas papers and their Santa in the Sky stamp, CI254. I covered the box with the papers and used a gold pen around the edges. The fiddly bit was that I wanted the design of the paper to run continuously across the lid so I cut the square for the lid, drew the circle aperture in pen, then cut it out with a circle Nestie. I then stamped the image directly onto the circle of paper, and again onto plain white gloss card. I wanted the word 'Believe' to run under the sleigh and above the buildings, rather than being obscured by them. I cut out the buildings and matched them up over the top of the stamped image to make them stand out. I added Polar White flower soft at the bottom of the row of buildings and in dots over the globe, and also adhered silver stars to the underside of the globe with glossy accents but they are not very clear in the photo. Definitely don't feel like getting the camera out again at the mo. I added one of my DIY pine cones under the globe at the base, then sprinkled some around the box to take the photos.
Wednesday, 23 November 2011
Venice Papier Mache Mask
My lovely friends, Jack and Pauline, were here yesterday and we had a great day. Jack very kindly brought me a papier mache mask so we could make them together. Hers are stunning! For mine I used metallic white paint and Mustard Seed Distress Ink. The stamps are by Oxford Impressions 'Venezia' and my favourite Crafty Individuals' scroll. I finished off with gem stone tears.
Sunday, 20 November 2011
Another Purse - in Pistachio with Bird Cages
I thought I'd better quickly blog this purse as I see it has popped up on the Crafty Individuals' blog. They have some blog candy at the mo, and there are some lovely things on there if you want to have a look. Paula, from Ephemera's Attic, whose bags had inspired me to make these has the most glorious pink bag on there!
I have made this purse with pistachio Lumiere paint, and two of the recently released Crafty Individuals' bird cage stamps.
Wednesday, 16 November 2011
Livestock - Gingersnap Creations Challenge
Today's new challenge launching on Gingersnap Creations Blogspot is Livestock, as part of their On The Farm month. I only have one suitable stamp for anything of this kind and I'm not afraid to use it lots! It's the chicken stamp from Crafty Individuals, CI 289. I bought the little hen coop with its chicken wire door at my fave shop in France. I covered it with texture paste and painted it with green and purple paints - sorry there isn't some deep and artistic meaning behind my colour choice, I was just in a green and purple mood! I covered the roof with glue from my hot glue gun and slung the raffia on to mimic a thatched roof and added more to the floor for the chickens to lay their eggs on.
I stamped out the image twice and kept it whole for the back of the hen house. I coloured it with Pro Markers and glazed the wing feathers with Glossy Accents. Finally I stamped another image and cut out the chickens to run around outside.
I've never used raffia before and if I had had any sense I would have entered it for the Raffia challenge on GSC last week, but no that would be far too logical and would suggest I know in advance what I am going to make! It is a fun product though so I'm sure I will use it again.
Sunday, 6 November 2011
Vintage Purse - Crafty Individuals' Bird Cages
Just when you thought I wasn't going to make any more vintage bags, I am sneaking another one in! This is one of the purse size bags. I painted it with Fresco Finish paint in Vintage Lace, which has more of a mushroom tone than it looks in the photo. I stamped it front and back with some of the new bird cages from Crafty Individuals. I added rose net trim around the clasp.
I lined it with a serviette that reminds me of Paua Shell, and some black gathered lace.
Wednesday, 2 November 2011
Farm Fresh - Gingersnap Creations Challenge
Today Gingersnaps are launching their Farm Fresh challenge for their On The Farm month. My contribution is this egg box featuring chickens from the Crafty Individuals' Farm Fresh Eggs stamp (CI 289). Hope you will join in!
Tuesday, 1 November 2011
Winter Wonderland - Crafty Individuals' November Challenge
The Crafty Individuals' Blog November Challenge is now up. The theme, as chosen by the lovely Lynne, from Adorn, CI's newest recruit, is Winter Wonderland. Funnily enough, so far we have all chosen to use the winter stag for our contributions, the new CI 332 but it does show just how differently it can be used.
I used Paper Artsy Fresco Finish paint with a layer of crackle on the papier mache box and stamped a few CI Christmassy words around it. I pushed 9 one inch Stampbord tiles together and stamped and coloured the stag, and then added some silver cord to fill in the gap around the edge of the lid, and a bit of Polar White flower soft to give more of a wintry effect.
I hope you will join in this month - plenty of scope with this theme. The prizes are, I think, amongst the most generous in Challenge Land as five winners get to choose a stamp of their choice - how cool is that!
I used Paper Artsy Fresco Finish paint with a layer of crackle on the papier mache box and stamped a few CI Christmassy words around it. I pushed 9 one inch Stampbord tiles together and stamped and coloured the stag, and then added some silver cord to fill in the gap around the edge of the lid, and a bit of Polar White flower soft to give more of a wintry effect.
I hope you will join in this month - plenty of scope with this theme. The prizes are, I think, amongst the most generous in Challenge Land as five winners get to choose a stamp of their choice - how cool is that!
Wednesday, 19 October 2011
Gingersnap Creations Challenge - Ravens - 'Trick or Treat' Lantern
Today Gingersnap Creations launch another Hallowe'en challenge theme - Ravens. I only have one Hallowe'en stamp and that is the spooky recently released raven in a churchyard with a full moon one from Crafty Individuals, which is CI 319. I had in mind I wanted to make an inexpensive lantern from a jam jar or similar, that children could take round the houses with them when they go Trick or Treating, or that you could have lit in the porch to show that you welcome Trick or Treaters and have candy! It would also work for parties in the garden.
I stamped the images twice on tissue paper and once on card and coloured them. I applied the tissue paper ones to the jar, which was an empty bath foam bottle which was perfect for the purpose, and cut the raven from the card one. I covered the lid with spiders web paper and added the card raven. I bought some skellingtons from Poundland and gave one to Brenda, she gave me the spiders webbing, and we split the pack of skull candles which we got at the car boot sale on Sunday - isn't it great to have friends you can share a cup of sugar or a skellington with?!
I filled a little bottle with blood (red Crystal Lacquer) for the skellington to clutch, and dribbled some everywhere! I gave him some black grungeboard wings to make him look like a really scary cross between a raven and a skellington - imagine him flying over your head! Except he won't be flying anywhere as he has had a nasty bash on the head, followed by being hung in a noose just for good measure! I fashioned some string around the lid to make a handle, and tied some 'barbed wire' around it. I added some raven table sprinkles (thanks again Brenda!), and popped an LED tea light inside. I used the skull tea lights to pose the photo. I forgot to photograph the side with a skellington hand charm on it.
All just a bit of fun but could make a cheap lantern just for the Hallowe'en period.
I am entering this for the Happy Daze October challenge which is anything Christmas or Hallowe'en.
Had some good news on Friday - I won the Stamp Man challenge for the Greco Roman box I made. I have given it to Col and he likes it! That is even more of a challenge!
Labels:
Crafty Individuals,
Gingersnap Creations,
Happy Daze
Monday, 17 October 2011
Altered Bottle - Bird Cages
For this altered bottle I have used a selection of Crafty Individuals stamps including the new Lady with Birdcage, CI331, Birdcages and Birds, CI329, and Bird Cage with Flowers, CI320. I've also used my favourite old set of flowers heads, CI206, and added some flowers cut from some beaded and sequinned trim.
The photos are awful so I've given you several: quantity rather than quality!
Wednesday, 12 October 2011
Gingersnap Creations Challenge - Alcohol Inks
For Gingersnap Creations Alcohol Inks Challenge which starts today, I thought I would make another evening bag and use alcohol ink to change the silver chain and clasp to bronze. The Florodora stamp is by Crafty Individuals, CI148, surrounded by their flowers CI206. The fabric flowers are homemade. Around the clasp I used the lovely trim Petra gave me which I used on the Venice bag, and tied some into a bow at the centre. Of all the ribbon stash I have, this trim seems to be perfect for these bags.
The inside of these bags when you buy them is a white plastic washbag type of lining which is practical but not very nice for a vintage evening bag. This time I painted it with mushroom Paper Artsy Fresco Finish paint and it worked fine. Does anyone know when we will be getting new colours in this range as I find them so versatile?
Hope you won't get bored with these bags, as I am making some purse sized ones at the mo ......
Sunday, 2 October 2011
Crafty Individuals' October Challenge - Winged Things - Hallowe'en Bottle
Crafty Individuals have just announced the theme for the October challenge which is 'Winged Things'. I hope you will join in! I decided to make something with a Hallowe'en feel to it, to be seasonal, and also to use the rather sinister-feeling raven stamp in a spooky churchyard which they recently brought out. I had also wanted for a while to make an altered bottle, so I have combined the two into this:-
I used grungepaper wings cut from a die kindly lent to me by Alison, and cut into them a bit more to make them look more like the ones on the stamp. The fake blood is red Crystal Lacquer, and to echo the barbed wire on the stamp, I wrapped the whole bottle in wire, cut some tiny pieces of it, and twisted them around at intervals. The skull and crossbones is a Grungeboard Element, and I added white opaque pen and red blood for some more definition, and a skull charm on the bottle top.
The fun thing about altering bottles is it is such a cheap and accessible medium, and very addictive (another one coming soon!).
This is a bit different to my normal style, I think!
I used grungepaper wings cut from a die kindly lent to me by Alison, and cut into them a bit more to make them look more like the ones on the stamp. The fake blood is red Crystal Lacquer, and to echo the barbed wire on the stamp, I wrapped the whole bottle in wire, cut some tiny pieces of it, and twisted them around at intervals. The skull and crossbones is a Grungeboard Element, and I added white opaque pen and red blood for some more definition, and a skull charm on the bottle top.
The fun thing about altering bottles is it is such a cheap and accessible medium, and very addictive (another one coming soon!).
This is a bit different to my normal style, I think!
Wednesday, 28 September 2011
Wednesday, 21 September 2011
Gingersnap Creations Challenge - Shared Moments
For this canvas I used Crafty Individuals' stamp CI 070 Mother and Child, Background CI 256 and Flourish CI200. I used some glass bead gel but it isn't very apparent unless you get in close, but it adds a bit of texture. I have also used pieces of flower sequin trim to bring out the peach and turquoise colours. The theme for today's Gingersnap Challenge launch is Shared Moments, and the mother and child image said that to me.
Labels:
Canvas,
Crafty Individuals,
Gingersnap Creations
Subscribe to:
Posts (Atom)