This week's challenge starting today on Gingersnaps is Wax. I would like to thank my lovely, very dear friend, Jack, who showed me how to do candles a few years ago. It is such a nice technique to have up your sleeve and fairly quick but effective. If you are still making gifts for people or want a table centrepiece for Christmas Dinner, I would really recommend them.
I would also recommend the homemade pine cones because if you leave them on the cocktail sticks, you can plunge them into anything and they stay put. I quite fancy doing some in dry oasis as a table decoration, maybe with some fake connifer and berries. I got the fake connifer in a big pack for £1 at my local craft shop, Nancyz Crafts, which always seems to sell exactly what I want.
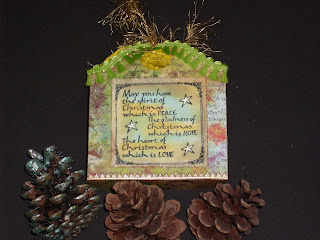
The other pine cones I have been putting on my blog over the last couple of weeks have been left plain, but this time I added fake snow to go with the snowy scenes on the candle. I don't have the Tim Holtz pine cone die but you can easily follow his instructions but without the die. At first I thought, well if he says you can use the die to make roses, how about turning that on its head and using a spiral flower die to make the pine cones! And I had one of those! So I started off using my Marianne Creatables die. I didn't have the Kraft Core but I thought, ok, if you are using dark brown Core-dinations, the core will be a light brown anyway. So I rang Nancy and she had 12 x 12 sheets in French Roast for 50p a sheet, which makes loads of pine cones!

Then I decided I wasn't making life difficult enough for myself so I made some without the die. I had a wavy edge pair of scissors which came free with a craft magazine. I cut a rough circle, then cut a spiral into it, letting it get a bit thicker nearer the centre so that the base of the pine cone would be a bit wider. It wasn't a very deep scallop design so I snipped just one millimetre with a pair of scissors between each scallop so that I could bend the 'petals' out further, like on a pine cone. I cut a nick into the centre the way Tim explains, so that it forms a base. The only other thing I did differently was to colour the cocktail sticks with a brown Pro Marker, which disguises it if any of it shows.
Finally I cut some snowflakes out of roasting tin foil. I used the Tim die for that - I'm not stupid enough to cut those myself!! I plonked them into the candle on memo pins. Everything is now falling off the kitchen cork board!
Another, maybe more conventional way, to do the same candle would be to have small evenly sized pine cones and to stick them into the candle in a continuous circle around the base, like a wreath. I was in the mood to have them jutting out at odd angles though!
I am entering this into The Stamp Man challenge which is to Create an Ornament.


