Tuesday, 30 September 2014

Homes and Gardens Canvas Inspired by Jo Firth Young


I loved the triptych of houses made by lovely Jo Firth Young, Designer for Paper Artsy, and thought I would use up some of the sheets of Chatsworth transferred onto canvas I had left, together with some canvas arches I had had in my stash for ages which I thought would work great for houses, with some more Chatsworth transferred onto them. I used Paper Artsy script tissue as the base of my canvas with some stencilling. At the bottom I used Darcy's grasses stamp and I found to add depth it works well if you turn it upside down and just use the bottom part along the edge for some stumpy grass. For the doors and chimney I have used some Thorndon Hall canvas, with painted buttons. The flowers on the far ends are made as per my blog post here.

I am entering this into the September challenge here.

Lynne Perrella Christmas Card Inspired by Wanda Hentges


One of the delightful new Guest Designers on Paper Artsy, Wanda, did a great background technique using a credit card to scrape Frescos onto Smoothy Heavy Weight Card and build up layers and knock them back. Such a great technique to have in your arsenal and so quick to do. It creates great visual texture and a little paint goes a long way. I used the same colours as Wanda, from Lin's new set with Plum, Marlin, and Evergreen, and added a little Dusty Teal, and Chalk for knocking back. I didn't have an old credit card as I cut back on store cards years ago so I cut up an ice cream lid. It is very important to eat lots of ice cream so you always have plenty of lids. Top Tip.


I'm not big on Christmas so I used a Lynne Perrella image as Lynne is like turkey, not just for Christmas. I made a faux poinsettia using a Lin Brown stencil. I call it 'faux' because instead of red I used Plum to tie in with the colours already used. It's a bit mad so I don't know if it works. I finished off with some dyed seam binding.

I am entering this into the September Paper Artsy challenge.


Sunday, 28 September 2014

Fresco Stamped Grungepaste Card - Inspired by Sara Naumann for Paper Artsy


It's always a treat when Sara Naumann guests on the Paper Artsy blog as she gives us both a step by step and a video. We all love a video, I think, and having the step by step makes it easier when you go back to have a look when you want to follow something. I've only just bought my first set of Sara's stamps, ESN09, the one with the sunburst and some grungy bits on, which I know I will use a lot. I think I've been slow to buy them because although I love text and background stamps, I tend to like each project to have a focal image. Seeing how Sara uses them has helped me to get ideas though. I guess I get set in my ways.

For this card, Petra kindly let me use some stamps of hers when she was at my house crafting for the evening. It's a departure from my normal style and I love how it turned out so thank you Sara! Sara showed two cards here and here.http://blog.paperartsy.co.uk/2014/09/fresco-stamping-with-signature-designer.html I have applied the Fresco to create a frame and also stamped with Grungepaste. For a splash of colour I added some orange buttons which I painted with Frescos - Yes, still some leftover roof buttons! The artful twine arrangement was down to Petra!

I'm entering this into the Paper Artsy challenge, Inspired by Sara Naumann.

Saturday, 27 September 2014

Heart Sewing Case with Chatsworth Canvas Transfer


I've been gradually building up the needlework stamp sets from Paper Artsy for a few years now as vintage sewing is one of my favourite themes, and then I spotted that That's Crafty, one of my favourite retailers had a couple of sets in their Clearance section. In fact, they have a few Hot Picks sets at a bargain price! So I now have all of them. I had been working on a heart shaped needlework case and coincidentally their challenge at the moment is All You Need is Love. I wanted to show lots of different things you could do with my canvas transfer technique which you can see on the Paper Artsy blog here. I used a pack of Papermania Bare Basics Canvas Hearts and transferred a mixture of Chatsworth and Thorndon Hall papers onto one side of them, and on the other side I stamped a selection of the sewing images using archival Potting Soil.


I then painted two pieces of shrink plastic, one with Fresco in Dolly Mix, and one in Guacamole, and stamped the largest button in Potting Soil, cut it out with a circle die, and hole punched the holes. I then stitched them onto the different layers.


Sewing always makes me think of love. When I was a child my Mum used to make my clothes and then matching sets for my dolls. I used to go to sleep to the whir of her sewing machine, which she inherited from my grandmother. Such a gentle sound. She has been doing a lot of hand sewing recently as she has lost several stone in weight and has been altering her clothes. I suggested it might help with her Raynaud's, and amazingly, the pain has nearly gone! I guess it has helped the circulation. Her old sewing machine remains a problem, though. It is a BSM in a silvery blue colour, with a wheel, not a treadle. I am guessing it might be around 1930s. It has a bullet bobbin. She wants to use it again but can no longer remember how to thread it. I have searched the internet and looked on You Tube. Any thoughts would be very gratefully received!
 

Friday, 26 September 2014

Grid Background Card and Notebook inspired by Anneke De Clerck for Paper Artsy


On Paper Artsy, a new Guest Designer, Anneke De Clerck, made a Mini Book/Notebook from scratch using a bookbinding, and a wonderful background paint blocking technique that I wanted to try. I am entering the Paper Artsy September Challenge.


I used Smoothy Heavy Weight Card and went about it a very long-winded way as I used Eclipse masking strips to form grid lines. I've now ordered a mask which will be easier but probably a different sort of effect. This took me ages. I started off like this. with Marlin, Evergreen, Plum, and Dusty Teal.


Then I added some lighter, brighter colours.


And the dry brushing of Chalk. I really like the metamorphosis into pastels! I will definitely do this again!


In fact I did!


Here's the card and notebook I made, and I have some left from the first sheet to make something else too. Thanks, Anneke.


Huck Finn Anchor


I had a wonderful time on Sunday at the Big Stamping and Scrapbooking Show at Ally Pally, and as always, the best thing was meeting up with lots of lovely people!

I had had in mind as I walked around that I wanted to join in the Country View Crafts challenge this month which is Nautical, using my Huckleberry Finn stamps by Artistic Outpost, and I saw this anchor on the MDF man stand. I thought it would be perfect! I painted it with Fresco Finish in Sky Blue with some dry brushing of Chalk, and some South Pacific around the edges and then used all of the stamps in the set with a selection of blue and brown archival inks to build up layers of stamping. I used Cobalt for the steamboat and Jet Black for the boys (Huck and Tom?) as I wanted these to be my focal points. I coloured the little boys with Fibralos. Does the Mississippi count as Nautical?!  I suppose it flows into the sea eventually!


I used the largest stamp with Huck and the Steamer on shrink plastic and tied it to the top with an anchor charm.


I am entering this into the Country View Crafts Challenge which is Nautical and the Artistic Outpost September Challenge which is Anything Goes.

Wednesday, 24 September 2014

Paper Artsy Canvas Transfer Experiment - Thorndon Hall Sketchbook


Here's another example of something I made using the canvas transfer experiment which I showed on the Paper Artsy blog here. I love the colours of the old Thorndon Hall papers and I have a stationery set I made a while ago so I wanted a matching notebook. This is another of the Reeves A5 canvas covered ones. By the way, Royal and Langnickel also do one. I used some of the older Paper Artsy stamps and layered them up on the canvas transferred background using different neutral shades of archival. For the flowers I stamped them on acetate and them painted them from behind with Fresco paints. I die cut the letters using a memory box set using more Thorndon Hall canvas transferrred paper. The tags on the spiral binding are Thorndon Hall transferred onto some canvas tags from Papermania.


There's a great prize up for grabs if you join in the Paper Artsy challenge before the end of September. Details are here.

Friday, 12 September 2014

Canvas Transfer Technique onto Chatsworth Paper - over on Paper Artsy!

 
I was delighted to be asked to show a technique over on the Paper Artsy blog where I've experimented with transferring Chatsworth paper onto canvas. I hope you will hop over there and see how I've done it and all the lovely products I've used and leave me a comment! Thank you so much! I've given a little bit more information below on how I made the two example projects and I will follow this up at a later date with some more things I've been making as there are so many ways in which you can use this technique. I made this sketch book and canvas:-


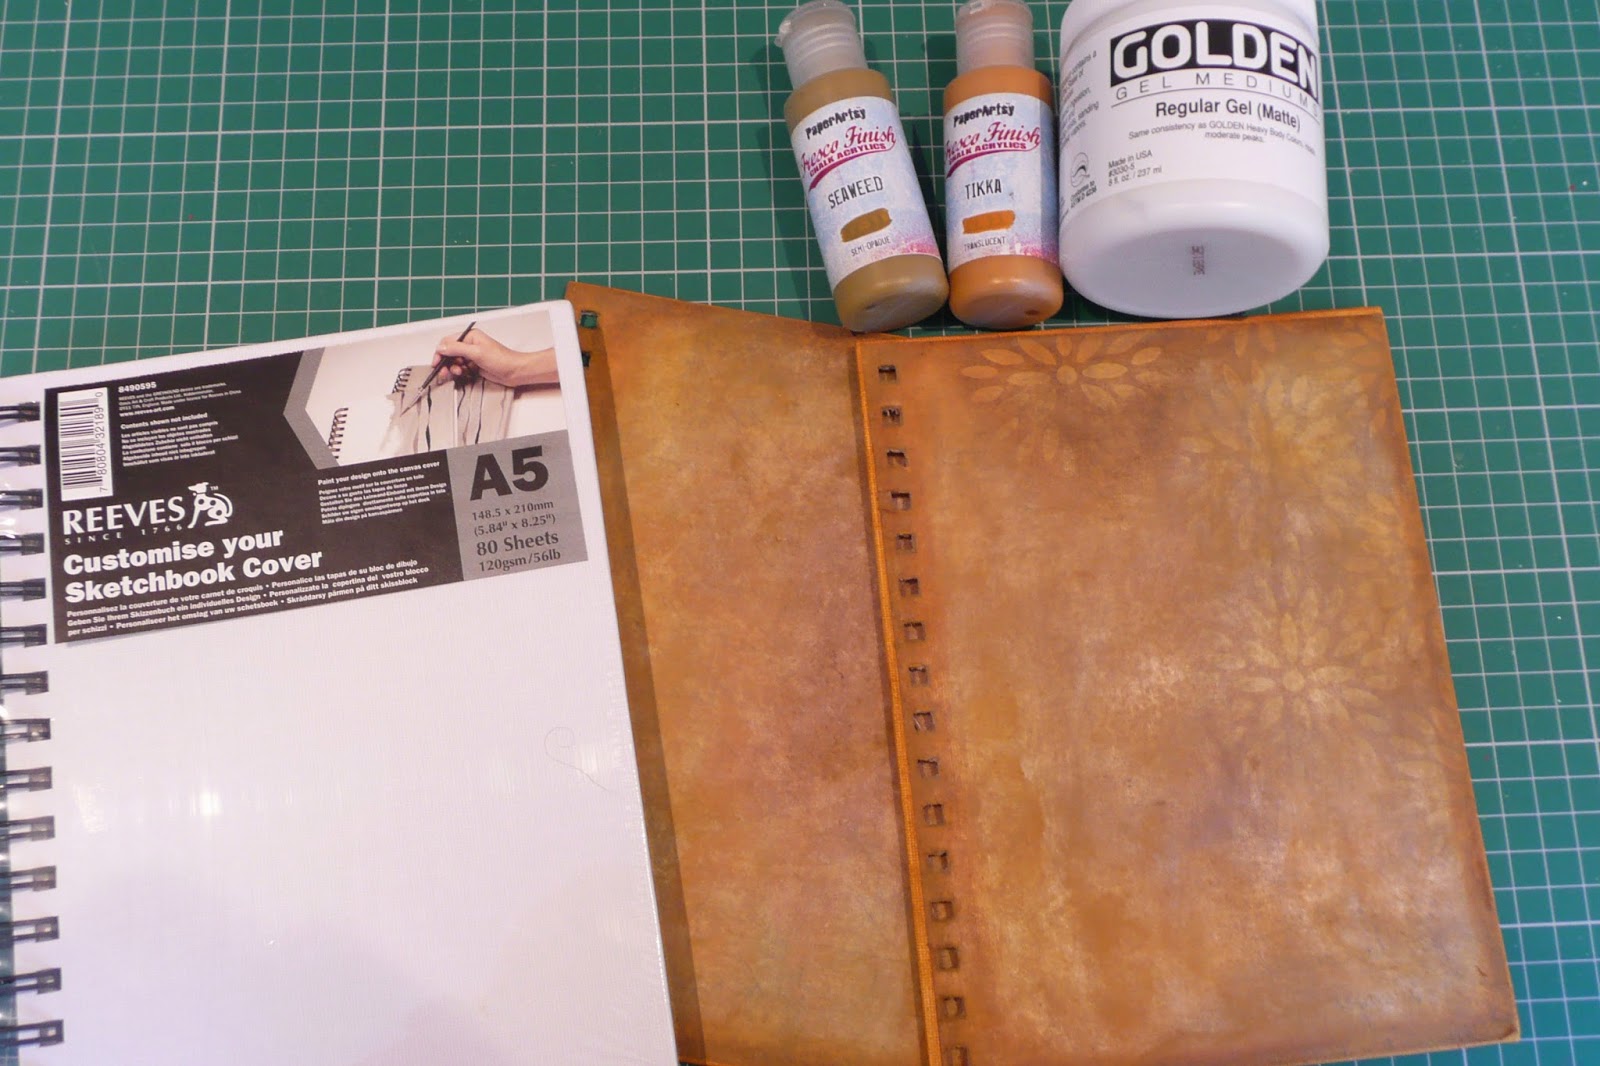
The sketch book is a Reeves A5 canvas covered spiral bound book which you can get from The Range or on-line. I popped it off the spiral binding to work on, and painted the edges with a mixture of Seaweed and Tikka Fresco Finish Paint. I then transferred the Chatsworth paper onto it using the method described in the Paper Artsy post. I used the design which features the flower which is like the design in the stencil PS005. I know you would think it is difficult to work around the spiral holes but actually it was easy to pop them out with my craft knife.


I added some extra stencilling of the flower using the same paint. All the stamps are from Darcy's EDY10, apart from the grasses which are from EDY09. I stamped the bricks to the sides of the cover with a mixture of Caramel, Tikka, and Cinnamon, to give the effect of a walled garden. I stamped the grasses in Marlin and Seaweed, varying the heights and doing some secondary stamping for depth. I stamped the birds at the top right in black Archival and the 'Turn your face to the sun' wording in Marlin (my new favourite colour!). So that was the background done!

Now onto the flower stem. I had prepared various pieces of Chatsworth transferred onto canvas. I stamped the flower stem using black Archival and cut it out, then stamped the individual flower heads onto a different design. I cut these out, distressed the edges with my craft knife, to emphasize the canvas texture, and cut into the petals slightly, and stitched different sized pearls into the centre for a quirky look. I love how you can stitch into the fabric nature of the paper now!

The stem wasn't as green as I wanted so I added a bit of Fibralo pen and blended with a damp brush. I stamped the leaves onto some greeny Chatsworth I had prepared and glued them on just at their bases. I used 3d foam at the base of the flowers so they were decoupaged on top of the layer below. For the Secret Garden wording on the bottom right, I used the stencil PS004 and mixed the Grunge Paste with Marlin. It is such a strong colour that it doesn't dilute too much when mixed with the GP, which I love! Once it was dry, I replaced the stencil and rubbed with Treasure Gold in Emerald.
 

For the canvas, I used one of the chunky 6 x 6 canvases from Paper Artsy and cut a 6 x 6 square of Chatsworth paper. I painted the canvas all over with a mix of Seaweed and Tikka and transferred the piece of Chatsworth to the top using the method I've given over on their blog. I wasn't sure if it would work so well on a less rigid surface but in fact it was just as easy. I used Tikka with a touch of Seaweed at the tips of the flowers through the stencil PS005 down the sides and on the top.


I used Marlin mixed with grungepaste through the Bloom and Grow PS008 stencil and once it was dry, replaced the stencil and used Treasure Gold in Emerald to highlight it. Now for the flowers! I used Darcy's EDY10 and just isolated the largest flower from the stem and black Archival to stamp it onto a selection of Chatsworth designs which I had transferred onto canvas. From then on I followed the method in Leandra's You Tube video here. I left the edges white to emphasize the canvas. I added leaves from the same stamp set, stamped onto green Chatsworth canvas sheet. I finished off with Treasure Gold in White Fire around the edge of the canvas.


In this photo I have transferred a couple of Chatsworth designs onto canvas on the left, but on the top right I have transferred it onto linen fabric which works just as well. In the middle I have stamped on a piece with black Archival using a Lin Brown stamp set and torn the edges. The bottom right is Thorndon Hall paper transferred onto a canvas board panel which would make a great book cover with a couple of book rings, or put through a Cinch or Bind it All:-


Here are the two final projects:-

 
There are so many things you can do with this technique, either transferring designs directly onto a canvas substrate, or preparing pieces of canvas sheet - you can then stitch it, die cut it, stamp on it, stencil on it, mould it around awkward shapes like frames, make a patchwork ....... If you are inspired to make something, there is an amazing prize up for grabs at Paper Artsy this month!