
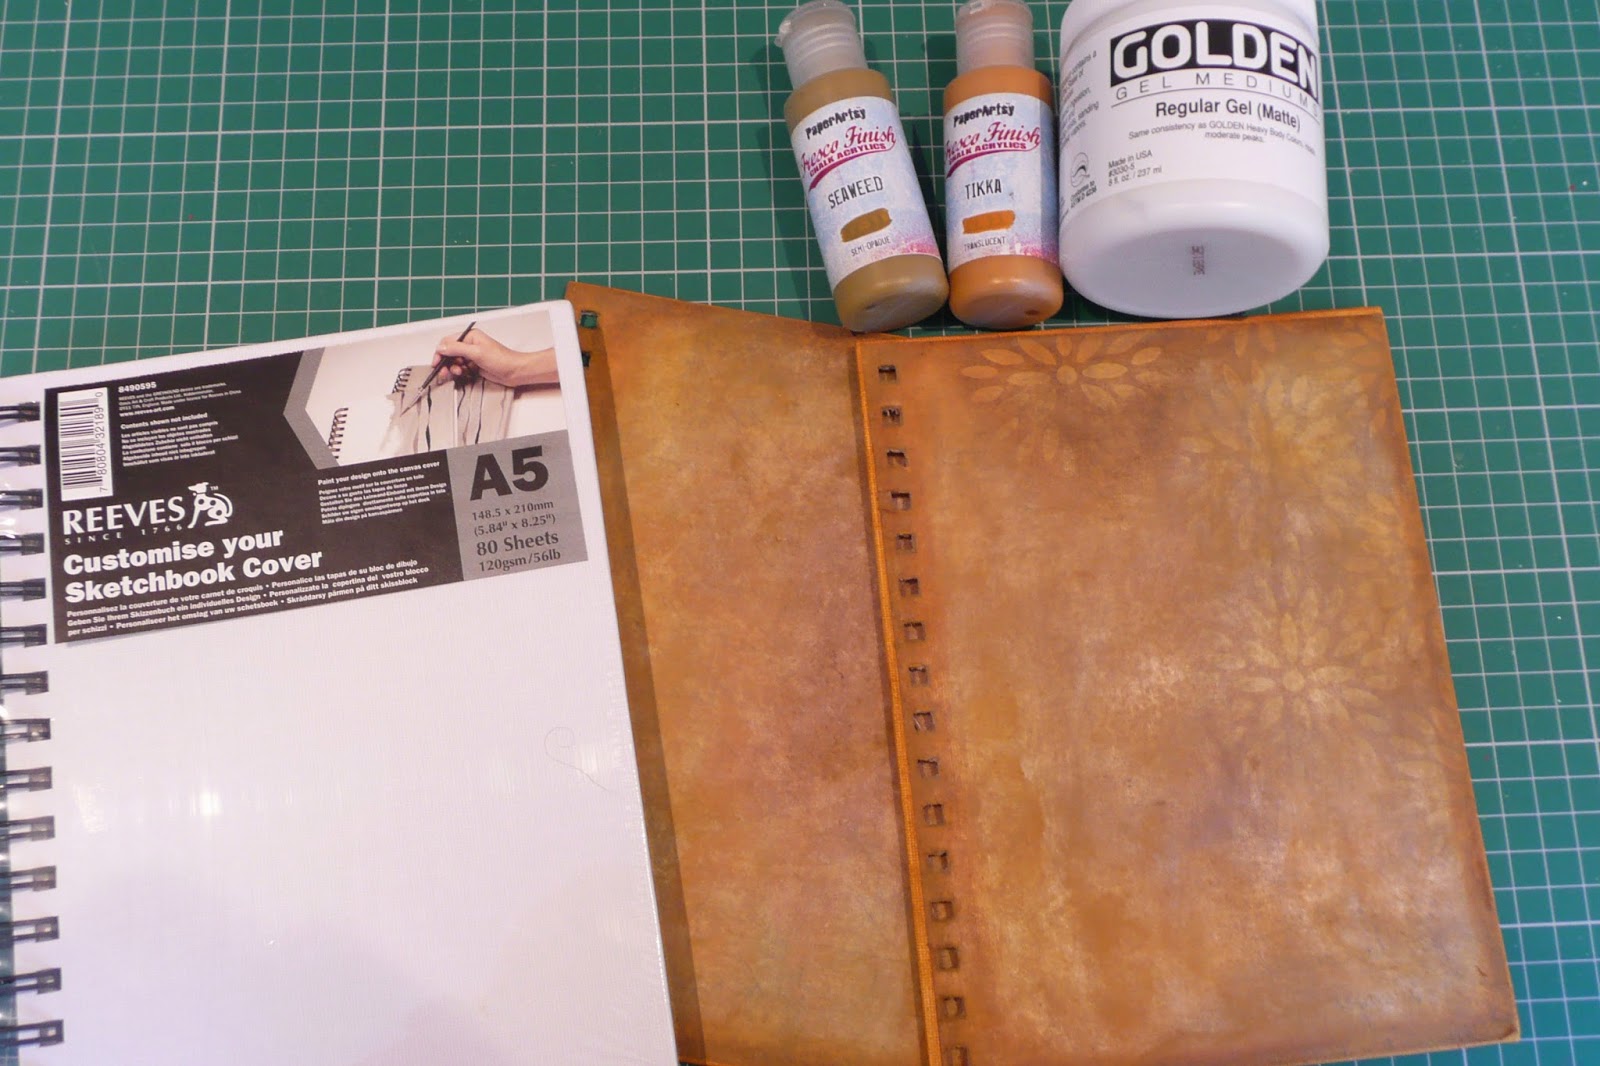
The sketch book is a Reeves A5 canvas covered spiral bound book which you can get from The Range or on-line. I popped it off the spiral binding to work on, and painted the edges with a mixture of Seaweed and Tikka Fresco Finish Paint. I then transferred the Chatsworth paper onto it using the method described in the Paper Artsy post. I used the design which features the flower which is like the design in the stencil PS005. I know you would think it is difficult to work around the spiral holes but actually it was easy to pop them out with my craft knife.
I added some extra stencilling of the flower using the same paint. All the stamps are from Darcy's EDY10, apart from the grasses which are from EDY09. I stamped the bricks to the sides of the cover with a mixture of Caramel, Tikka, and Cinnamon, to give the effect of a walled garden. I stamped the grasses in Marlin and Seaweed, varying the heights and doing some secondary stamping for depth. I stamped the birds at the top right in black Archival and the 'Turn your face to the sun' wording in Marlin (my new favourite colour!). So that was the background done!
Now onto the flower stem. I had prepared various pieces of Chatsworth transferred onto canvas. I stamped the flower stem using black Archival and cut it out, then stamped the individual flower heads onto a different design. I cut these out, distressed the edges with my craft knife, to emphasize the canvas texture, and cut into the petals slightly, and stitched different sized pearls into the centre for a quirky look. I love how you can stitch into the fabric nature of the paper now!
The stem wasn't as green as I wanted so I added a bit of Fibralo pen and blended with a damp brush. I stamped the leaves onto some greeny Chatsworth I had prepared and glued them on just at their bases. I used 3d foam at the base of the flowers so they were decoupaged on top of the layer below. For the Secret Garden wording on the bottom right, I used the stencil PS004 and mixed the Grunge Paste with Marlin. It is such a strong colour that it doesn't dilute too much when mixed with the GP, which I love! Once it was dry, I replaced the stencil and rubbed with Treasure Gold in Emerald.
For the canvas, I used one of the chunky 6 x 6 canvases from Paper Artsy and cut a 6 x 6 square of Chatsworth paper. I painted the canvas all over with a mix of Seaweed and Tikka and transferred the piece of Chatsworth to the top using the method I've given over on their blog. I wasn't sure if it would work so well on a less rigid surface but in fact it was just as easy. I used Tikka with a touch of Seaweed at the tips of the flowers through the stencil PS005 down the sides and on the top.

I used Marlin mixed with grungepaste through the Bloom and Grow PS008 stencil and once it was dry, replaced the stencil and used Treasure Gold in Emerald to highlight it. Now for the flowers! I used Darcy's EDY10 and just isolated the largest flower from the stem and black Archival to stamp it onto a selection of Chatsworth designs which I had transferred onto canvas. From then on I followed the method in Leandra's You Tube video here. I left the edges white to emphasize the canvas. I added leaves from the same stamp set, stamped onto green Chatsworth canvas sheet. I finished off with Treasure Gold in White Fire around the edge of the canvas.
In this photo I have transferred a couple of Chatsworth designs onto canvas on the left, but on the top right I have transferred it onto linen fabric which works just as well. In the middle I have stamped on a piece with black Archival using a Lin Brown stamp set and torn the edges. The bottom right is Thorndon Hall paper transferred onto a canvas board panel which would make a great book cover with a couple of book rings, or put through a Cinch or Bind it All:-
Here are the two final projects:-


Stunning Lucy! havent read the entire step by step yet, but will be back! Love the end results - gorgeous! Nikki xx
ReplyDeleteGorgeous! I shall be poring over this post and the PA one later and then having a go myself! I love the effect on the flowers and this is such a great way to do a background too. Clever, clever you! How do you come up with these ideas? Well done! Julie Ann xxx
ReplyDeleteI don't know how you do it, either! Love the way the pattern has transferred to the canvas and your finished articles are gorgeous - looking forward to seeing more.
ReplyDeleteAmazing idea with fab results - if a little tough on the fingers xx
ReplyDeleteTHese are gorgeous, Lucy, and the flowers are stunning. Hope you've had a lovely summer!
ReplyDeleteFabulous effect and amazing project! Gorgeous!
ReplyDeleteBrilliant post Lucy, wonderful effects and ideas. TFS.
ReplyDeleteHave a great weekend.
hugs Brenda xxx
Such a gorgeous project.Love this.xxx
ReplyDeleteWhat a fabulous technique and equally fabulous projects you created from it Lucy. Stunning pieces!
ReplyDeleteHugs
Lesley Xx
Beautiful projects Lucy! Am totally in love with your new book. Claire x
ReplyDeleteGreat tip about using the matte medium to remove the last of the paper for the transfer! Thanks for sharing!
ReplyDeleteOh my, your work on both pieces is so beautiful Lucy, they are both truly stunning! Anne x
ReplyDeleteThis is gorgeous!
ReplyDeleteAbsolutely brilliant Lucy you clever girl!!! Love the way you've managed it on the linen fabric too!! can't wait to have a play xxx
ReplyDeleteI love this book and the flowers look amazing x
ReplyDeleteThis book is beautiful and the flowers are amazing x
ReplyDeleteSo talented you are, Lucy! The sketch booklet and the canvas are gorgeous and so many details. Beautiful! Oh and I do hope you will pull out those AO stamps and join in! :-)
ReplyDeleteFantastic tutorial & projects Lucy...what a brilliant technique! xxx
ReplyDeleteLooks like a great technique, Lucy--your results are wonderful!
ReplyDelete(I haven't done a proper round of blog visiting in soooooo long, had to stop in and say hello to you!!!)
:)
This is fabulous Lucy, really pretty and a great technique that I need to try xx
ReplyDeleteThat's a fantastic project, wonderful texture.
ReplyDelete